On one hand there are many solutions pre made and expensive accessories that make the life easy. But maybe because I'm always bored or maybe because I'm bit paranoid on who has access to my data and network, but mostly the first one. I thought building my own system would be a good idea.
I had few points in my mind, which will explain also why things are so random. Remember, I was not working on a product, but I was playing with an experiment.
- Everything should be easy to the final user - hey it's not just me in the house!
- Every accessory should work with Apple HomeKit because that's all our devices in the house. While they decide to deploy Matter, I have to live with the limitations of the Apple echosystem.
- There should be no Google around. That's a choice I took some years ago and I'm not walking back on that just to have a fancy thermostat.
- The shape of the house is a bit challenging, including a private staircase from the 3rd to the 4th floor without any electricity available. Luckily enough, Dutch houses are made of paper, so wifi coverage won't be an issue.
- I already had plenty of random small electronics and microcontrollers and components from previous projects that I wanted to use. Also, I started from the hardware and had to find a way to integrate it all.
Software Overview
In quite a random order, these all of the various softwares and technologies I've used. Following soon there will be the hardware part, I promise!
Homebridge
Ok, Home Assistant is for sure the most complete solution there is out there. However, at the beginning of the project it looked a bit like an overkill for my goals, which were just making random devices compatible with HomeKit.
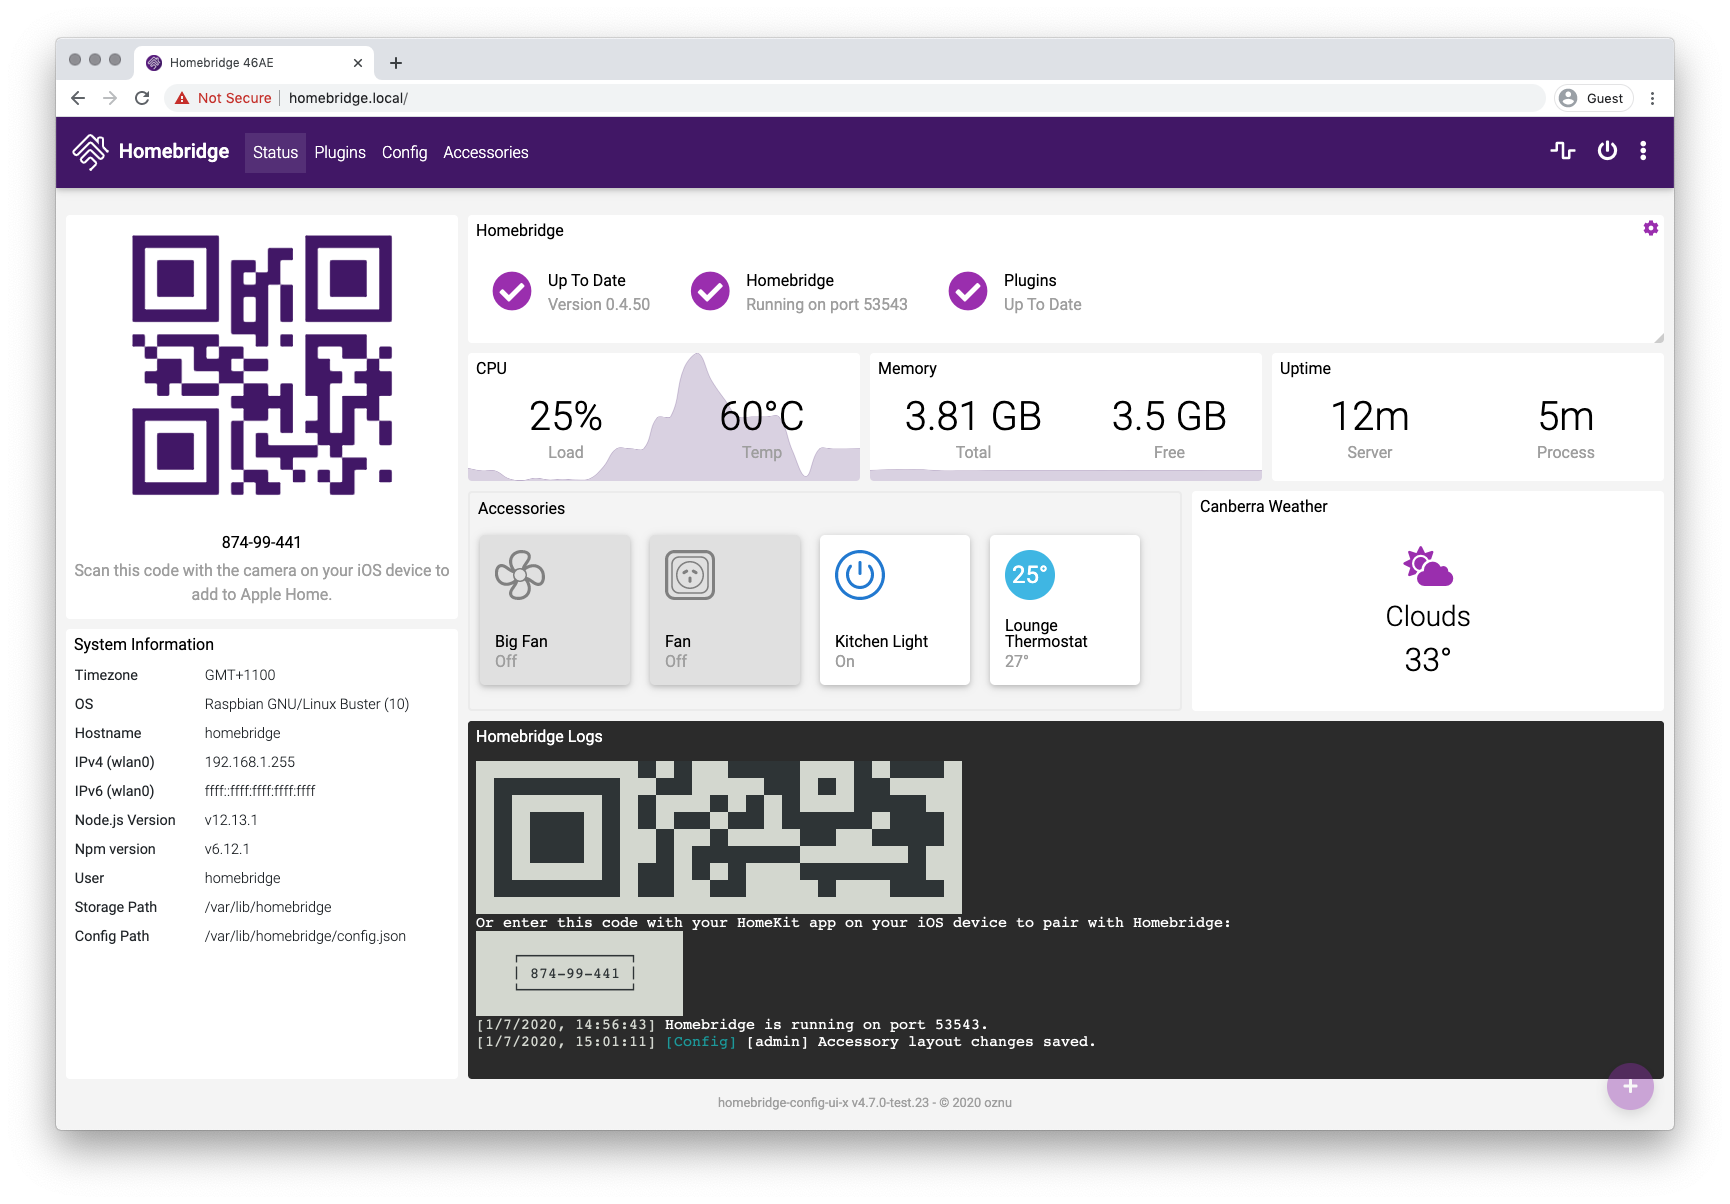
That's why my final choice went with Homebridge which is a fantastic open source project whose only purpose is to integrate all possible devices with HomeKit. It's simpler than Home Assistant but that also means that I feel more comfortable putting my hands on the code - and it still has 2000+ plugins created by the community.
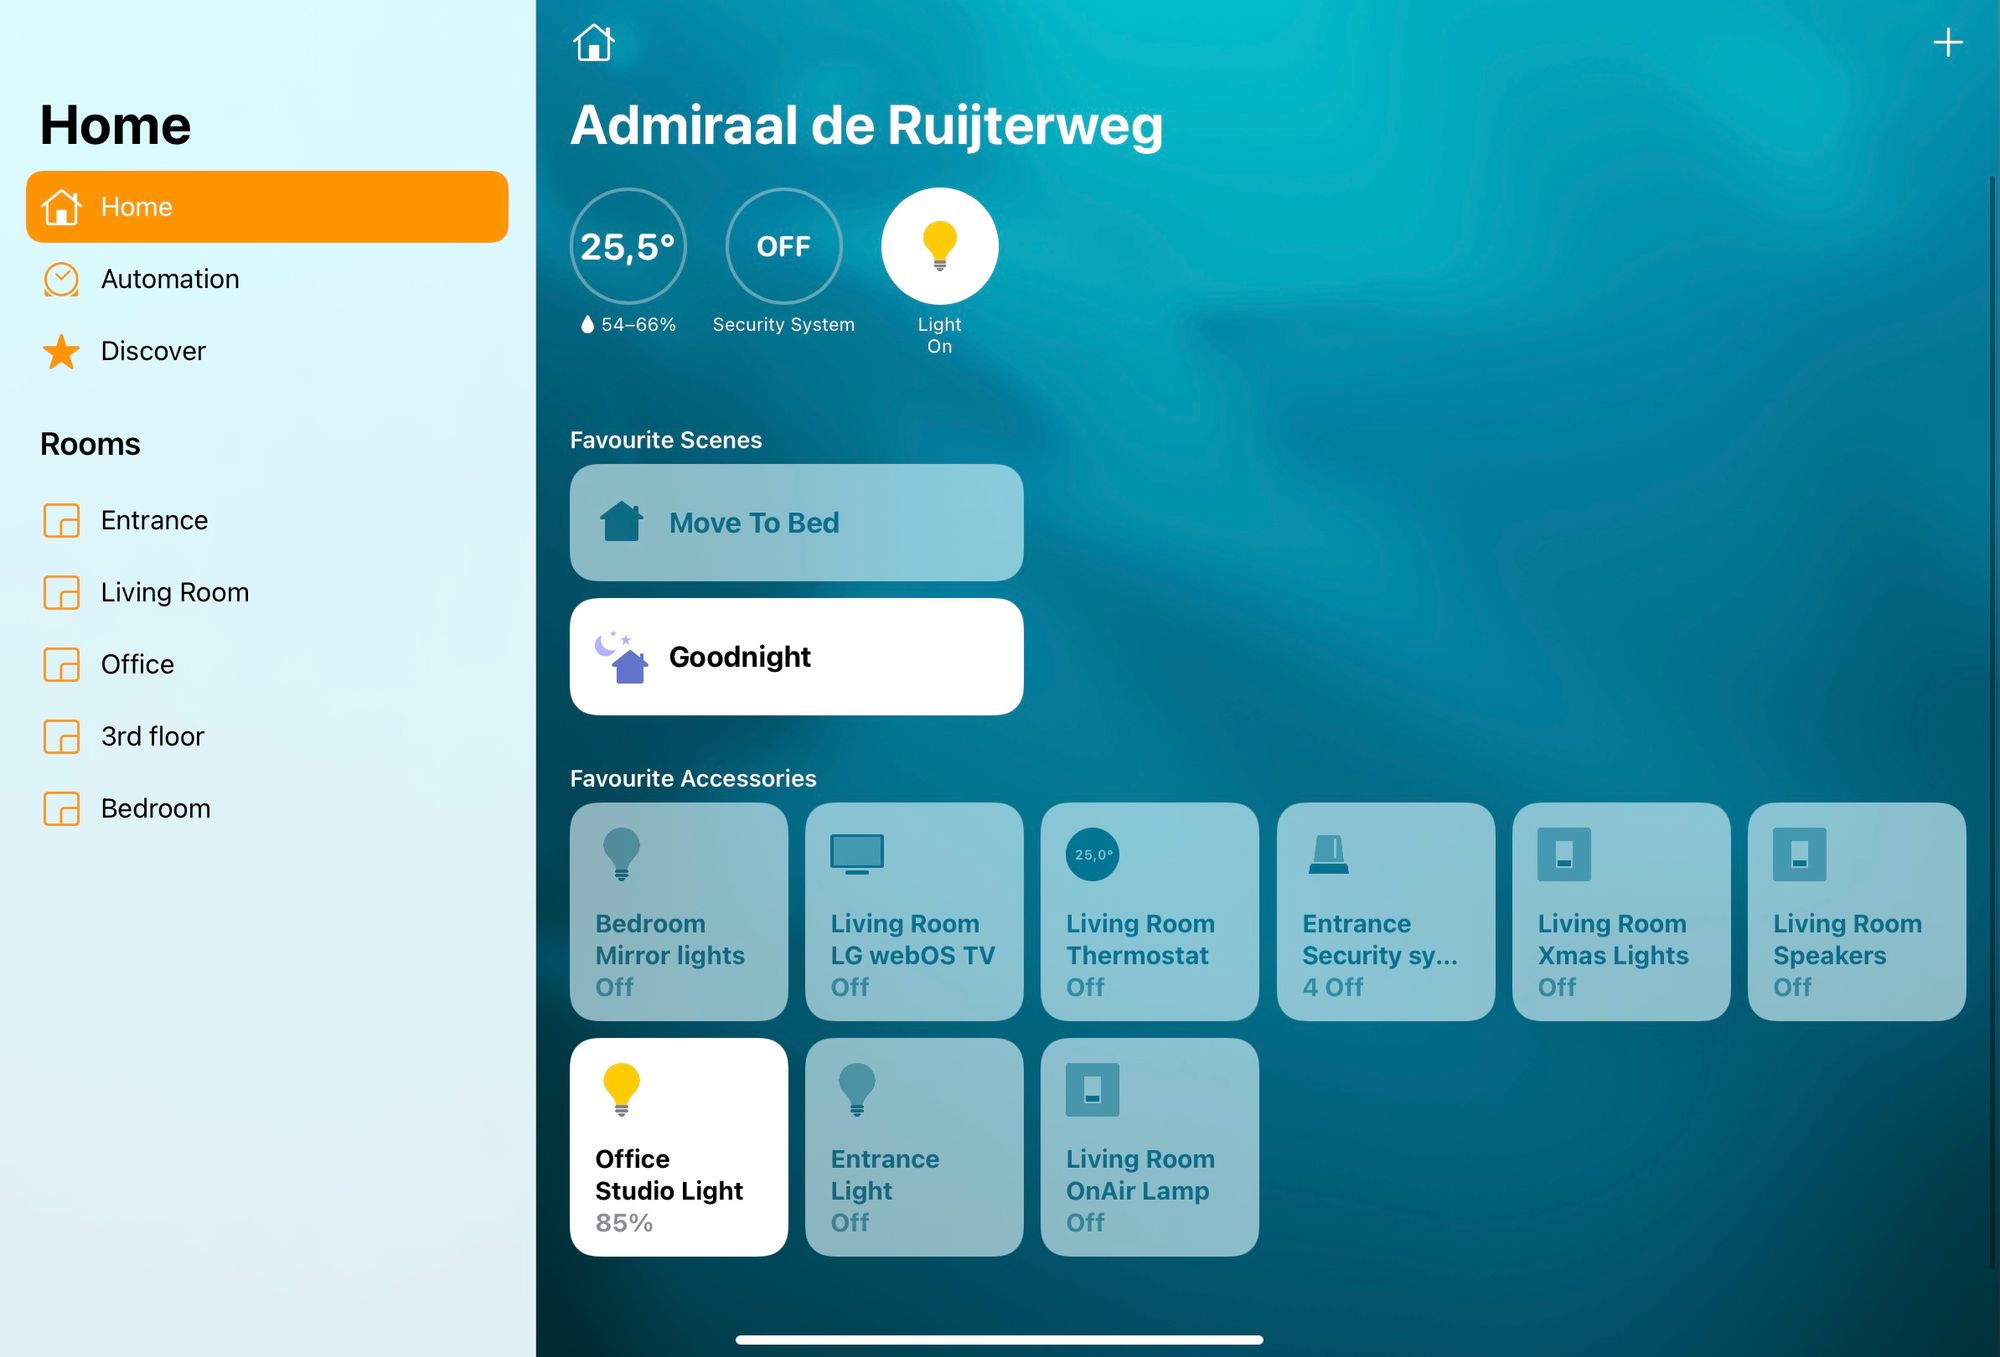
Homebrige is the brain of the home system and the interface for Apple HomeKit: whatever HB can see, it's reflected in the iPhone and iPad. However, it won't be the only software running.
MQTT
I already told you that I have many devices randomly created by myself - more below. When you have many different hardware and sensors and IoT stuff, there's only one thing that always always works: MQTT.
This is really where all the magic happens. While many devices that I've bought are ready to be connected (LIDL person, if you're reading me, I'm sorry for all the bad things I've thought about you while working on your smart devices), the homemade ones are really really dumb and they needed a broker.
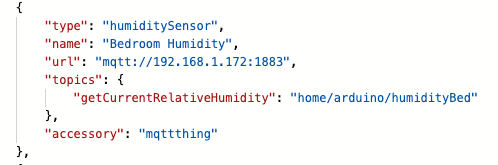
So, while the fancy devices had API, all the dumb devices relied on Mosquitto to communicate, to send and receive data. This is mostly true for sensors. Data pushed to the broker from all the devices are collected and translated for Homebrdige by the Homebridge MQTT-Thing plugin. The possibile configurations are endless, but it was rather a simple one for me.
HTTP devices
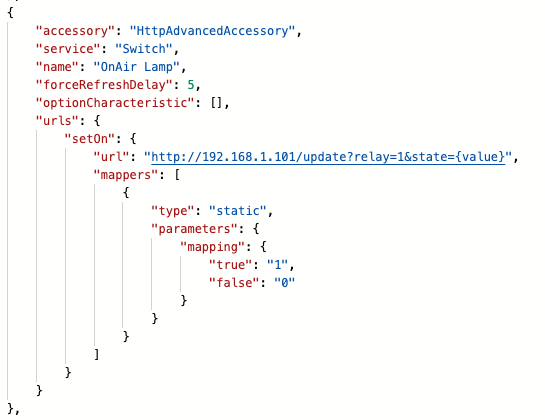
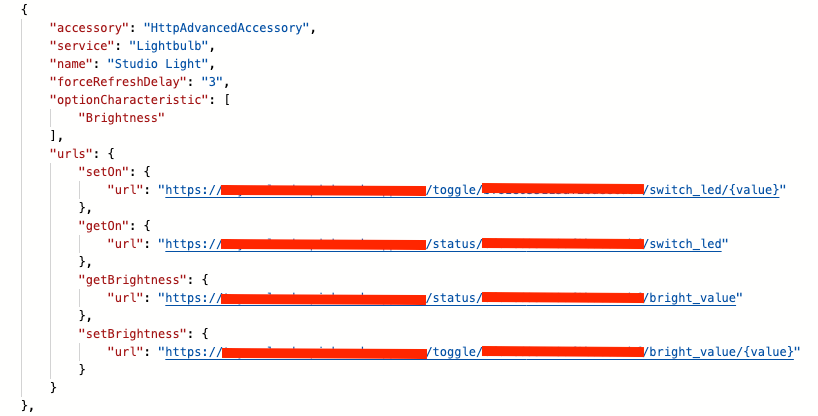
Probably the simplest way to implement IoT devices is to run tiny webservers and configure Homebridge to work with HTTP requests. There are many plugins that work this way, but I had to struggle to find a reliable and complete one. I feel I can finally suggest to use the homebridge http advanced accessory by Guido Moscarella. The flexibility in the configuration is just crazy and it allowed me to manage all the possibile endpoints regardless of their answers and behaviours.
Now, a small section about the LIDL devices. When few months ago they sold their "smart devices", I though that the super small price would justify some effort on my side to make them work. I was never more wrong. I'm going a bit into details because there's no other post on the web taking care of this, so there's a chance that you ended up here just to solve this.
In a nutshell, LIDL devices are produced by SilverCrest and it's a game of Chinese boxes until you can finally arrive to the underlying IoT cloud provider, Tuya, who ironically is a huge Chinese service provider. Now, you may think that LIDL devices are exposed by Tuya and you could use a simple Homebridge plugin to control them, like TuyaWebPlatform. WRONG, of course. They won't show up in your device list.
I've spent weeks searching for a solution and this is what I came up with, so please let me know if you have a smarter solution.
Step 1: I've registered as developer on the Tuya Cloud platform, created an application in development and associated all my devices to this account (specifically, 2 smart plugs, 1 dimmable bulb, 1 motion sensor).
Step 2: I wrote from scratch APIs to control the devices. Based on this random Nodejs package, I created a couple of endpoints which would allow me to retrieve the status of the devices and set them. Since the code is hardware-agnostic, you might find useful the source here on my github. APIs are running somewhere and the HTTP plugin I showed above is handling the requests in Homebridge. It seems crazy but it all works in a splitsecond.
Step 3: as said, configure it as an HTTP accessory in Homebrige.
Monitoring
Now, because controlling things is fun but I also want to be able to monitor all the fundamental values of the house - especially remotely, when I'm not there - I thought about using the most common IoT setup for this purpose. Also, don't forget it's a new house and I really need data to understand how much time it takes to heat it up, cool it down, rooms' temperatures etc.
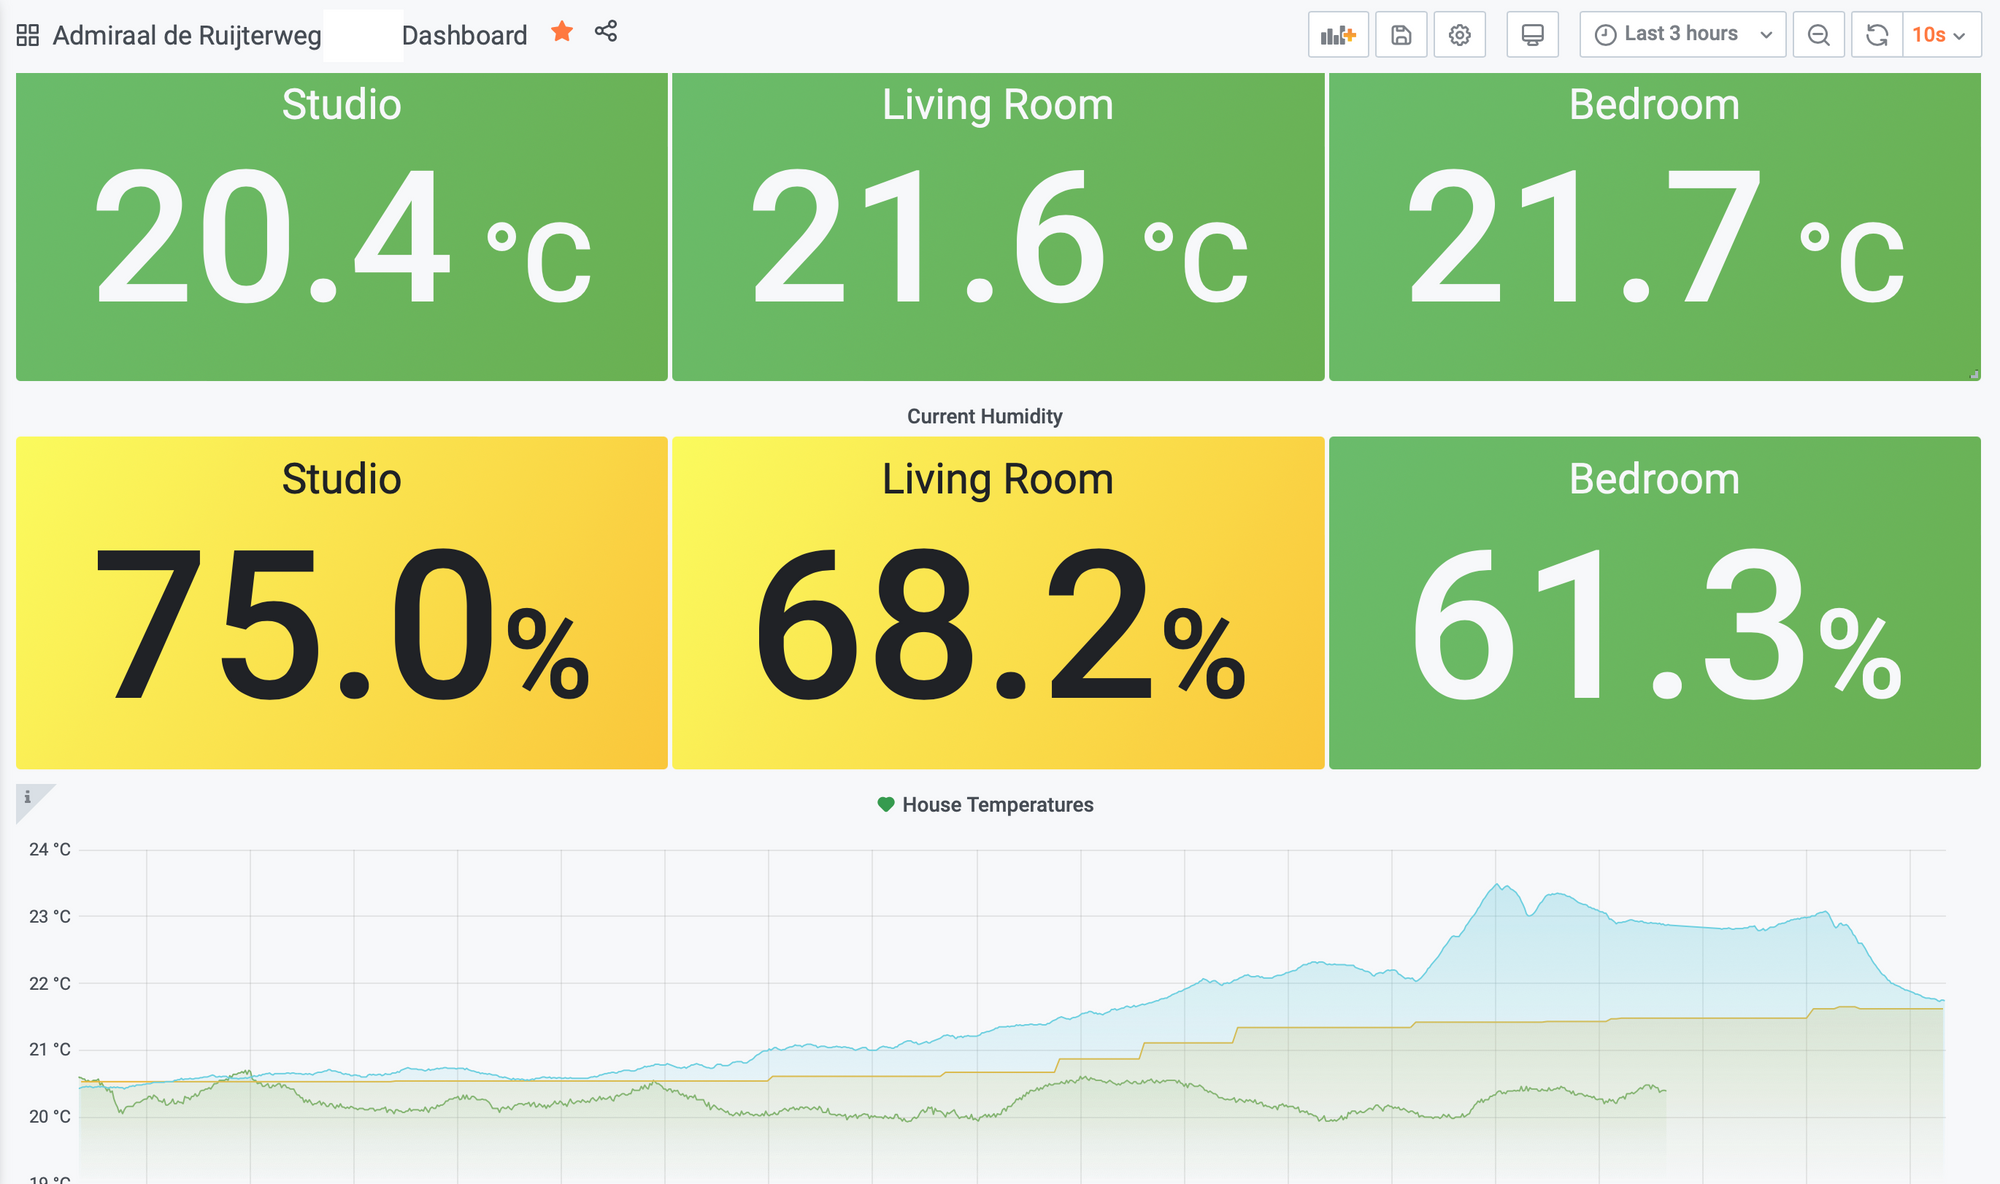
For this reason I created a Telegraf + InfluDB + Grafana stack that is running on a different old RaspberryPI 2 (it used to manage the private cloud before being replaced). Really in short, Telegraf constantly polls data from the MQTT broker (see above) and pushes it to InfluxDB; Grafana takes all that dirt and puts it into a nice graph where I can monitor at least temperature, humidity and heating status for each room (but also brightness etc, anything pushed by my sensors) and go back in time to understand the behaviours that I need - shoutout to the data retention schedules of InfluxDB!
TADO and its API
Now, as you remember, I wanted the house to be Google-free, so I had to exclude what clearly is the best market option, aka the Nest thermostat. Considering the price, the availability, compatibility with HomeKit and possibility to have APIs, I eneded up buying a TADO. Do I think it's the best choice? No. Is it good for me? Yes. Do I hate their subscription model? Yes, to the point I'm ready to develop my own thing to replace those few premium functions.
Anyway, being TADO compatible with HomeKit requires zero work to integrate. But hey, I also want the temperature, humidty and heating history in Grafana! That's when the absolutely-not-documented APIs came into play.
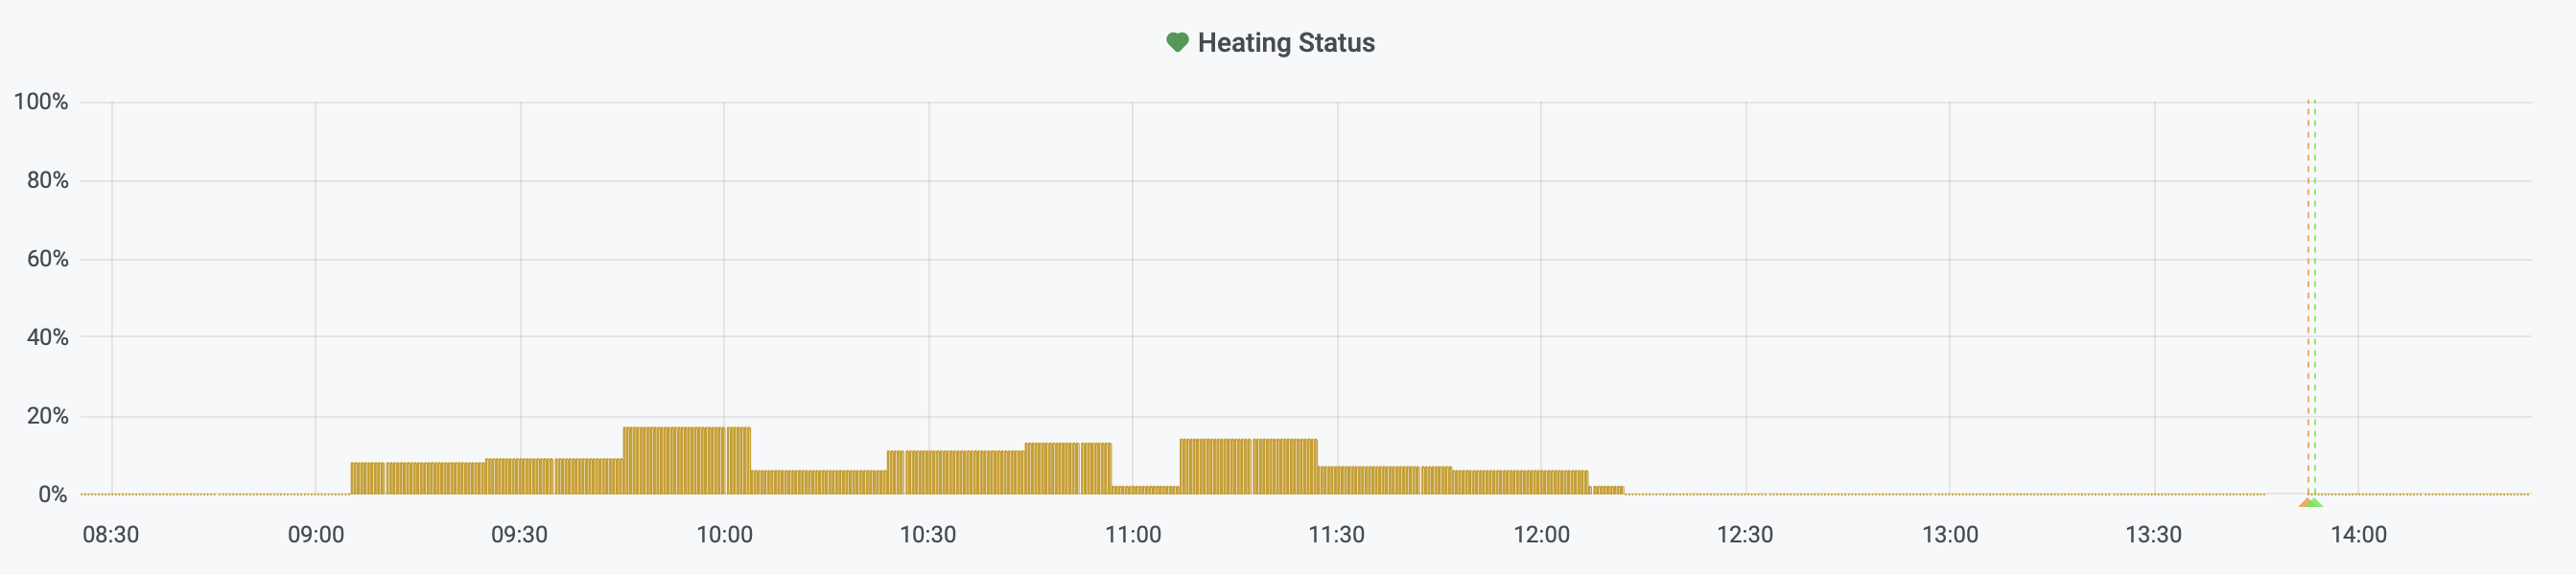
To fix this I created a tiny Phython script running on the same old Raspberry which constantly polls the TADO APIs and push the data into the MQTT stack etc etc. This work is absolutely unnecessary because TADO's app easily shows you the same data. But I wanted it all together in Grafana, hence...

This looks to be everything from the software side. I wrote this mostly because I need to remember how all the pieces interact: I'm afraid that one day I'll need to fix something and I won't remember how it's working.
I'm writing the second part of this post where I describe the hardware. Unfortunately I'll need to get up from my desk and take some pictures of the devices, so it might take some time. Bye!